
Docs
Put a SimLab conversation in your course
Turn any scenario you have built into a link or a SCORM file. Learners open it with no account, talk or type with the character, and your course gets the score, the feedback and any values you choose. You pay from your own tokens, up to a budget you set.
Overview
Build it
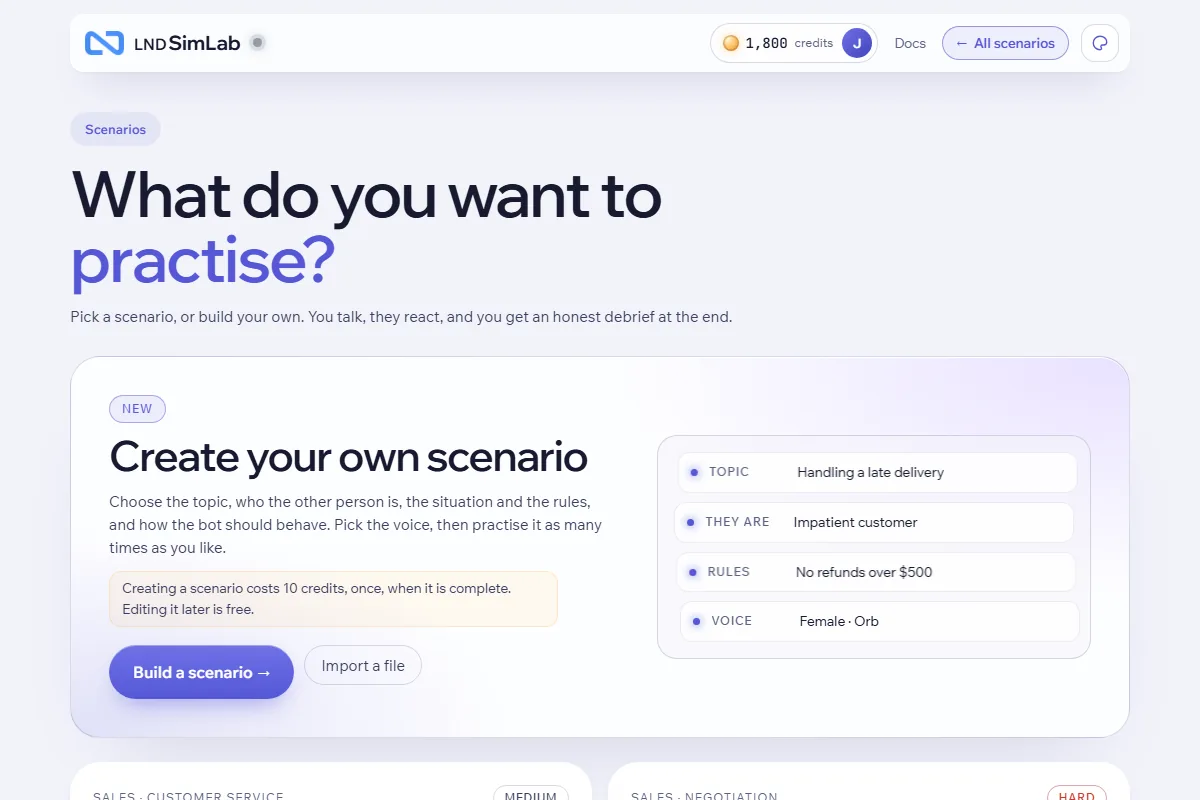
Create and finish a scenario in the practice room. The AI can draft it from a description.
Share it
Open one of your scenarios and go to its Share tab. Its link is already made: turn sharing on, pick Link, Storyline, Web page or SCORM, and copy or download it. Settings there sets how learners take it and the budget.
Use it
Paste the address into Storyline, Rise or your LMS, or upload the SCORM file. Watch the results come in. The address alone is enough.
Three ways for learners to take it
| Mode | What learners get | Microphone | Cost |
|---|---|---|---|
| Chat (the default) | A text conversation with the character. Replies appear as they are written, with the glowing orb beside them. | Not needed | 15,000 tokens a minute |
| Voice | The character speaks and listens. Learners can talk or type. | Needed (they are asked) | 207,000 tokens a minute |
| Avatar | A video avatar with a voice. Women's voices only. | Needed | 1,035,000 tokens a minute |
The address is all you need. Paste it into a Storyline Web Object, a Rise embed or any web page and the scenario works. Variables and JavaScript are optional extras for courses that should react to the result.
Start with Chat. It is the cheapest, works inside any course player, and never runs into microphone permissions.
Log in and your account
You need an account to build scenarios, make links and start practice calls. Learners who open a shared link need no account. They just open the address.
Create your account
Choose Sign up
On the home page or the practice page use Sign up in the top bar (or Log in, then the Create account tab).
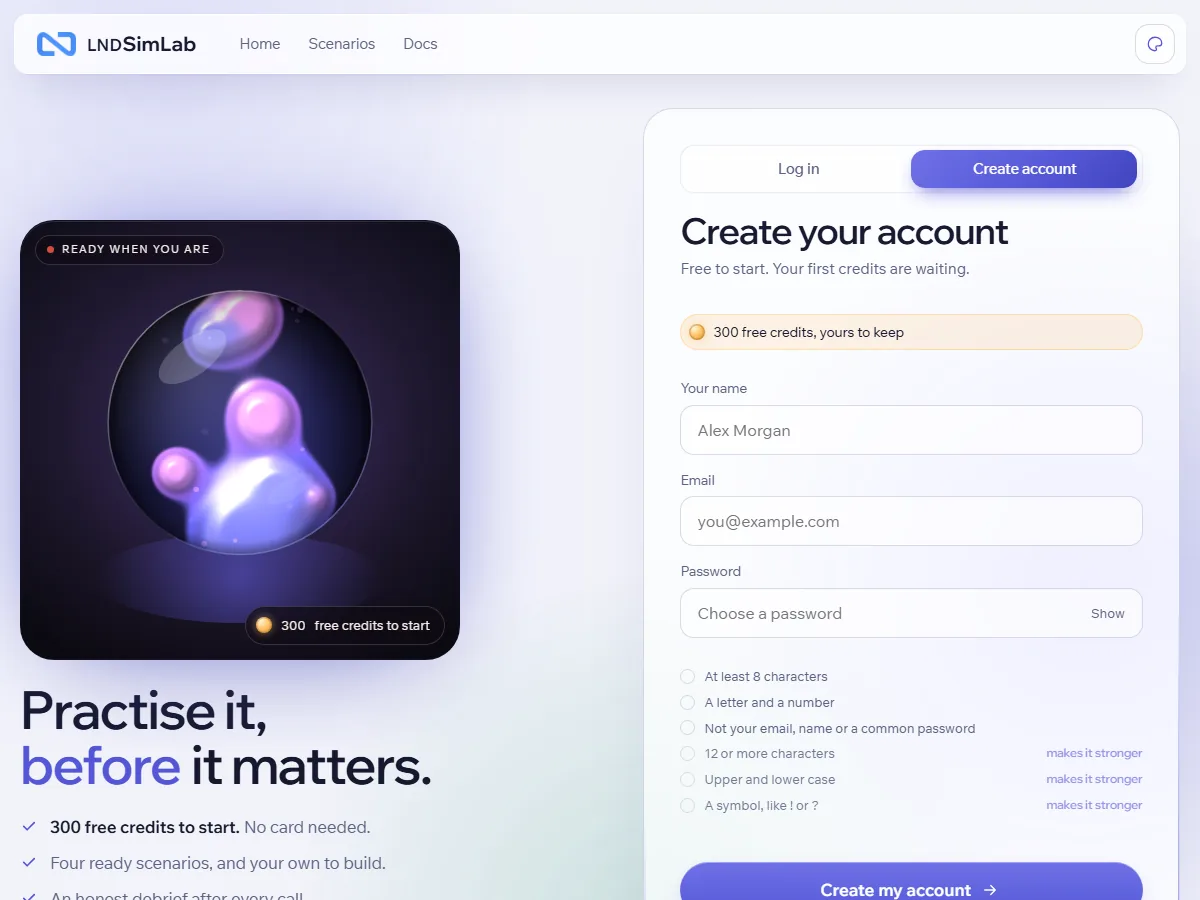
Create your account: a name, an email and a password. 4M starter tokens are waiting. Fill in your name, email and a password
The password needs at least 8 characters, a letter and a number, and must not be your email, your name or a very common password. A checklist and a strength bar show how you are doing, and Show lets you see what you typed. Longer passwords (12 characters or more, with upper and lower case and a symbol) are stronger.
Type the code you see
Sign-up asks you to type a short code shown on the page. It keeps automated sign-ups out.
Collect your welcome tokens
A small celebration confirms your account, and 4M starter tokens are yours to keep. They never expire, and your 3-day free trial starts.
Log in and log out
Choose Log in
Enter your email and password and press Log in. You are taken back to the page you were on.
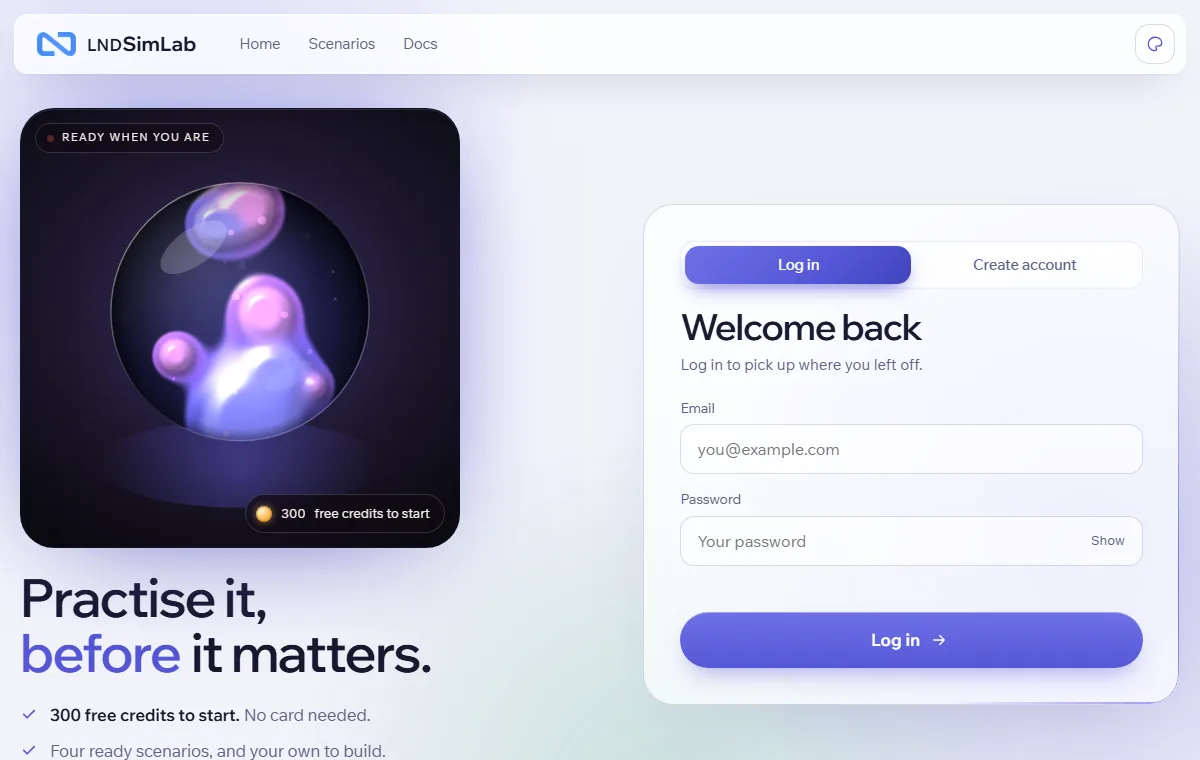
Log in with your email and password. You stay signed in
This browser remembers you for 30 days, so you do not log in each time. While your saved login is being checked, the side menu says "Signing you in...".
Log out
Use the red Log out button at the bottom of the side menu, or the one on your account page. Do this on a shared computer. Changing your password also signs you out everywhere.
If you cannot get in
After 8 wrong passwords the account is locked for 15 minutes, then you can try again. Check the email is the one you signed up with. Resetting a forgotten password by email is not available yet, so ask the team who set up your account.
Your account page
Open it from Account in the top bar or Overview in the side menu.
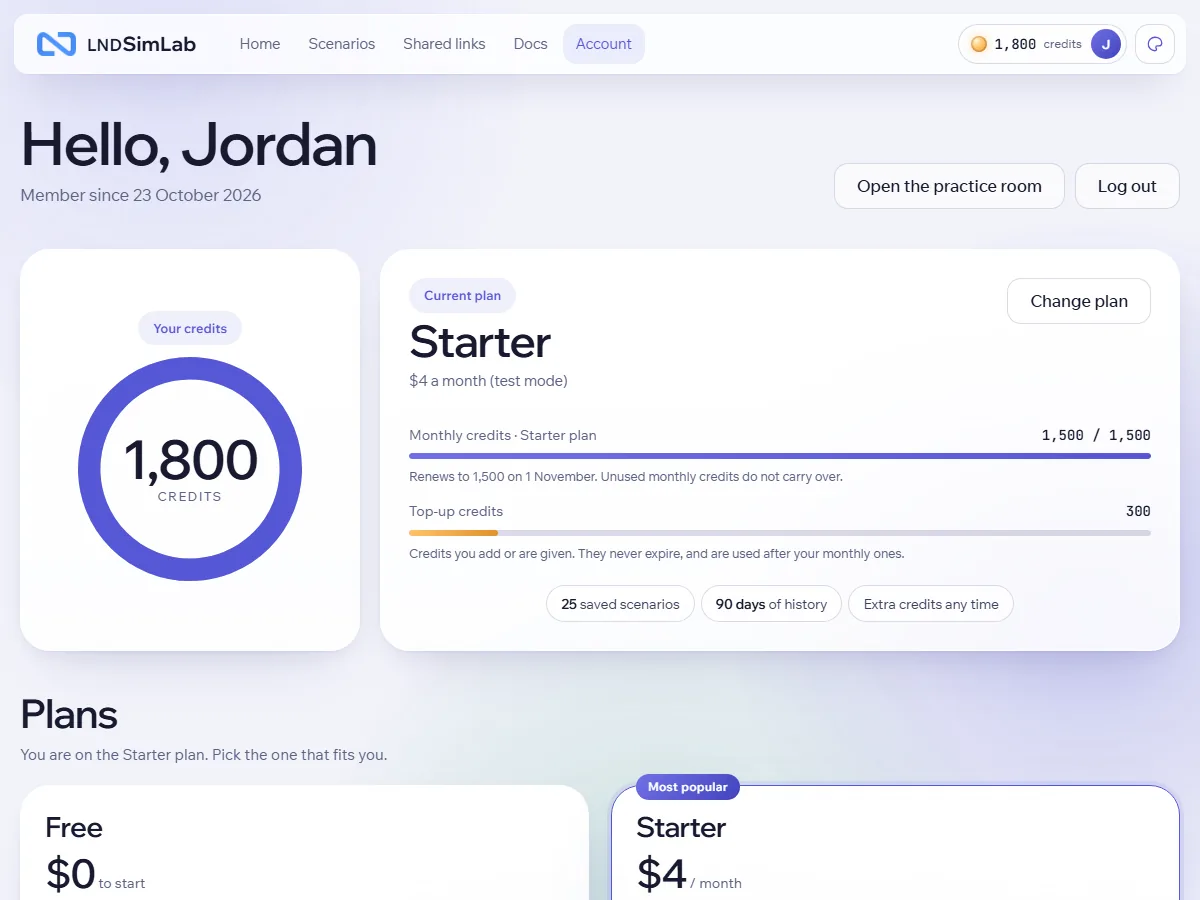
- Overview: your tokens (monthly and top-up), your plan and its limits, and a short list of recent activity.
- Plans: the same as every LND builder. A 3-day free trial (3 saved scenarios, 1 shared link, 1 custom character, 4M starter tokens), then Pro ($49 a month, or $489 a year, about 2 months free) or Lifetime ($999 once, the first 100 customers only). Pro and Lifetime give 100M tokens every month, 200 saved scenarios, 100 shared links and 10 custom characters. Enterprise is a custom plan for teams, arranged with us. Monthly tokens come on the 1st and do not carry over. When the trial ends you can no longer build scenarios or make calls (shared links pause) until you choose a plan; your scenarios stay on your account.
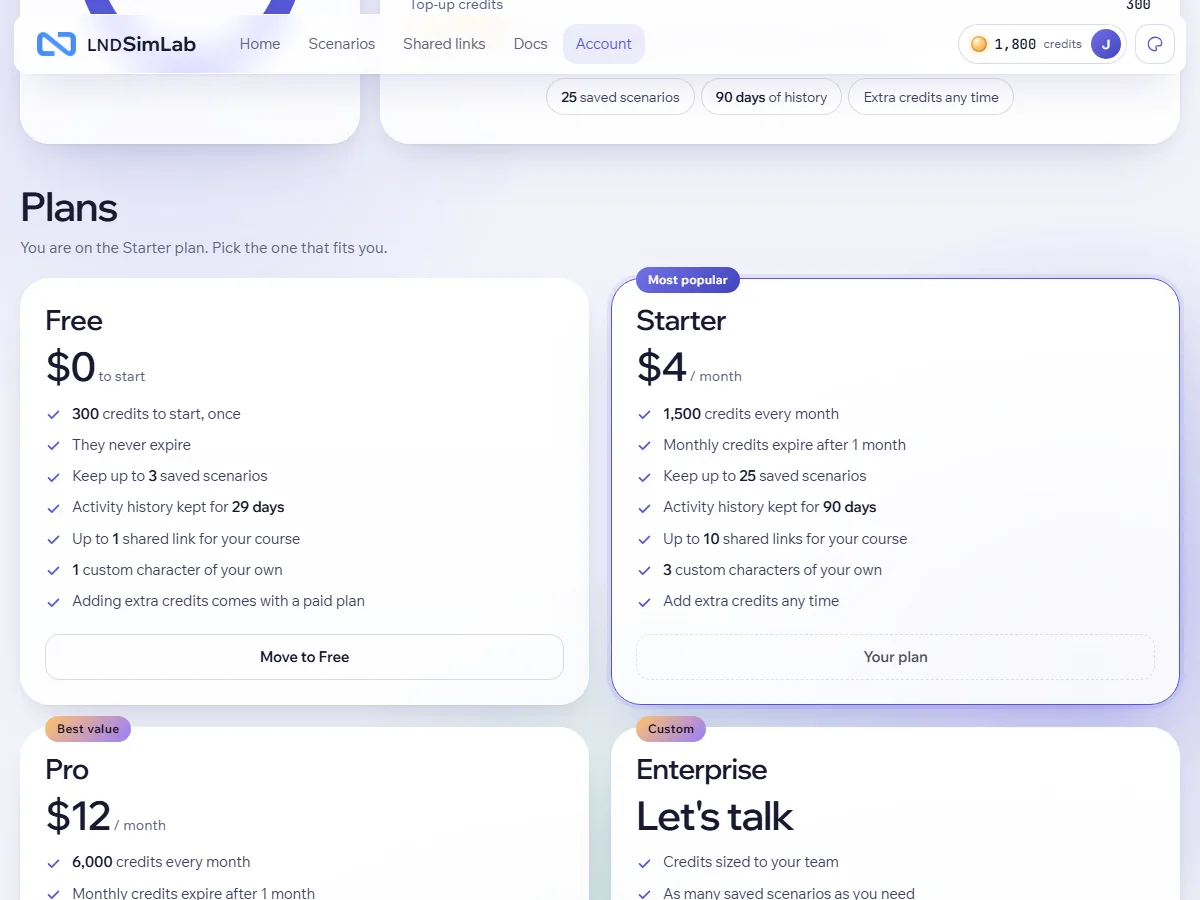
Pick the plan that fits. Plan changes are in test mode: nothing is charged yet. - Add tokens: top up on a paid plan. Top-up tokens never expire and are used after your monthly ones. (Payments are in test mode: tokens are added but no money is taken yet.)
- Promo code: enter a code once to add tokens. They never expire.
- Activity: every charge and refund, with the date. Calls that never started are refunded automatically.
- Settings: change your name or password, add your own AI key, or delete your account (you are asked for your password first, and your tokens and activity are removed for good).
- Where things live: your scenarios, links, characters and results belong to your account, so you see them on any device you log in on.
1. In SimLab
Build and finish a scenario
Log in, open Scenarios, then Build a scenario. A scenario is ready to share once it has a title, who the other person is and the situation. Describing it in a sentence and letting the AI draft it is the quickest start. Check the mood bar and the five mood words, because those are what your course will see.
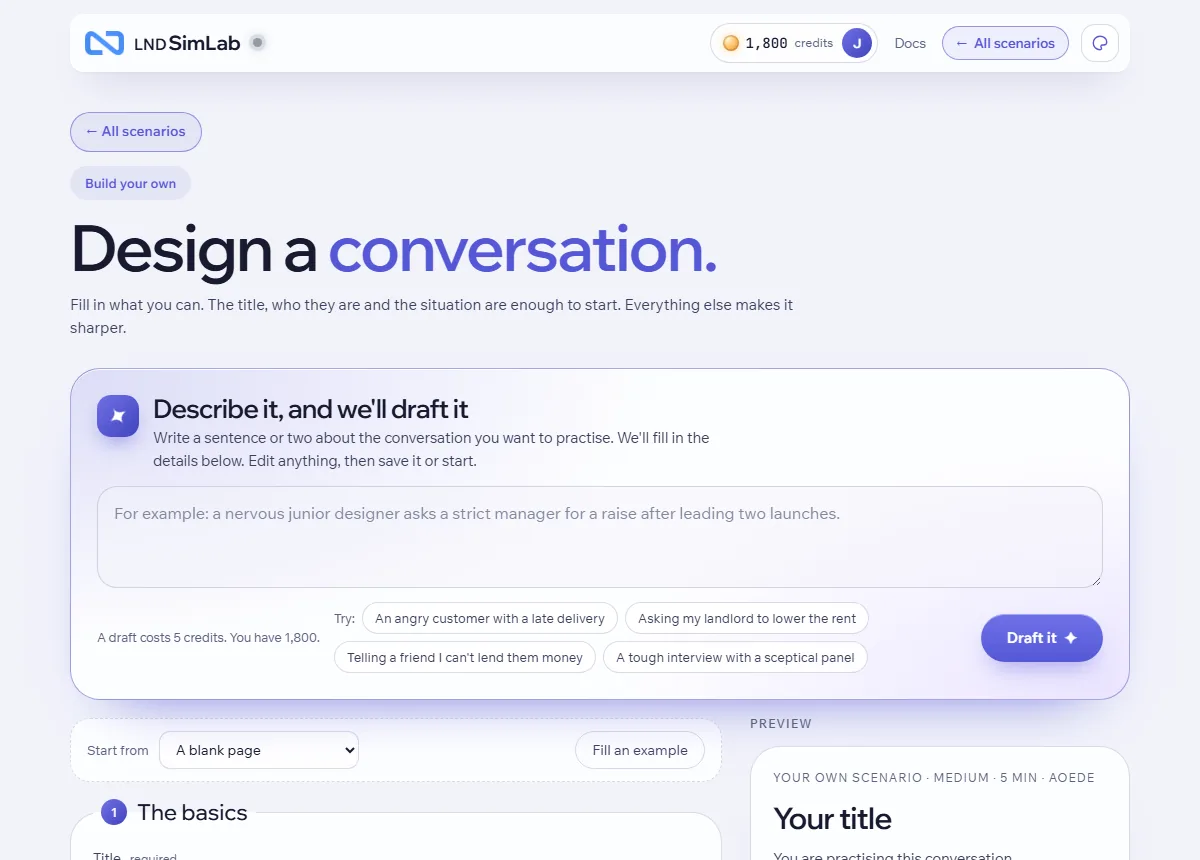
The builder. Describe the conversation in a sentence and press Draft it, or fill the form yourself. 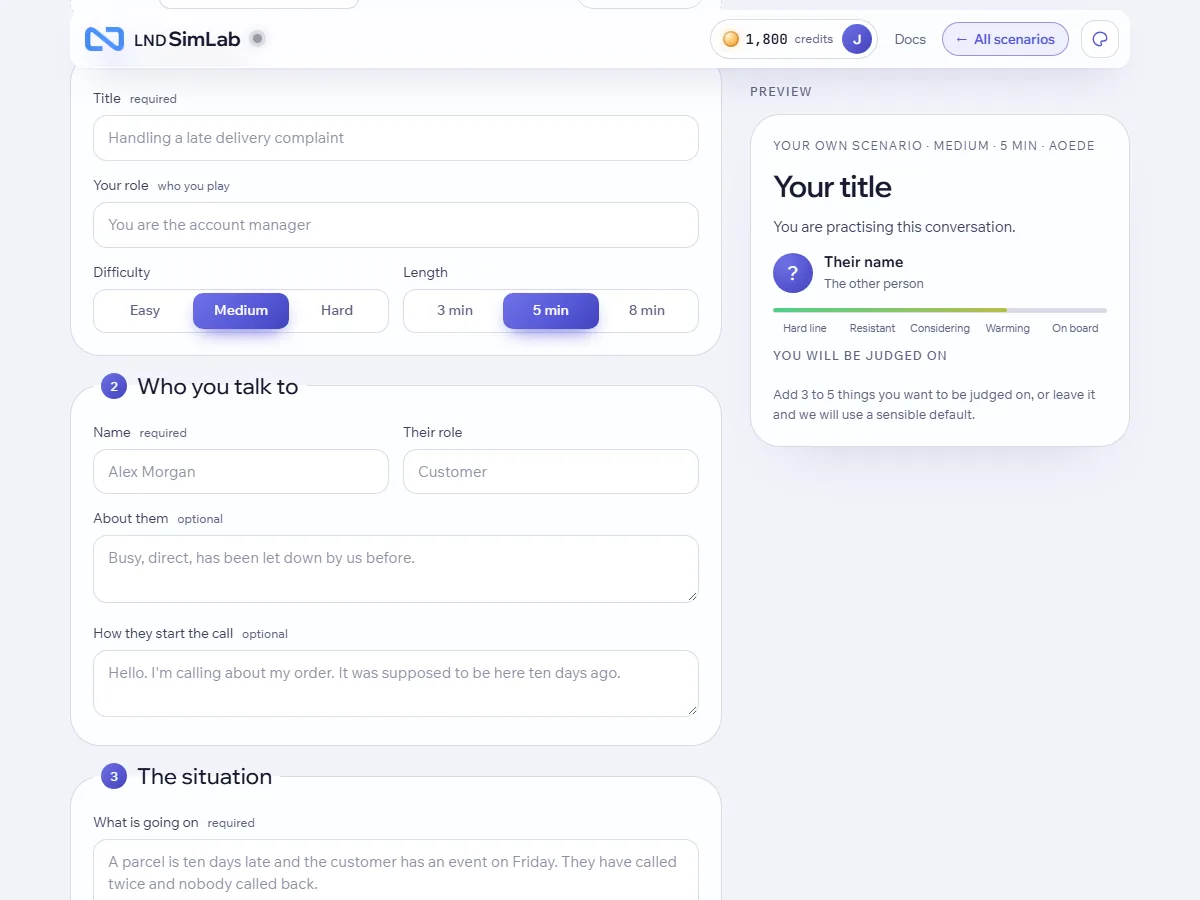
The form fills in as you go, and the preview on the right shows what learners will see. Say how much each criterion counts (optional)
Under How you will be assessed you list up to 5 success criteria. Once there are two or more, a picker appears beside each one: Minor, Normal, Important or Essential. The score is the weight of the criteria the learner met divided by the weight of all the criteria that could be judged. For example, with "Backed it with evidence" on Essential and "Used their name" on Minor, missing the first costs far more than missing the second. Leave everything on Normal and every criterion counts the same, as before. Important and Essential criteria are tagged in the preview and on the learner's result, and the same score goes to your course and to your results table.
Open the Share tab
Open one of your scenarios from Your scenarios or the side menu and press its Share tab. Its link is made for you and switched off until you turn sharing on. The Results tab shows who has taken it.
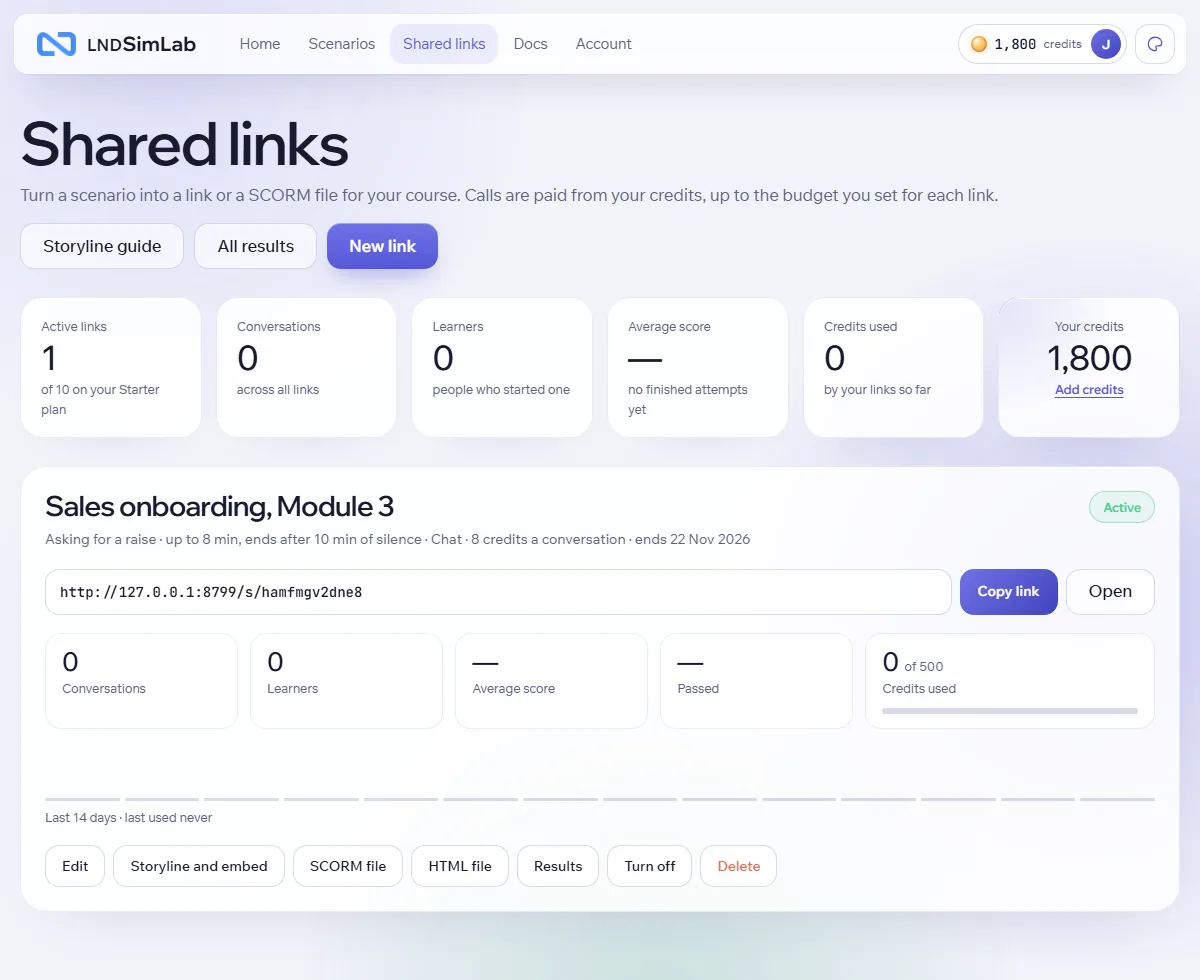
The Share tab: every link of the scenario with its address, results and budget. Pick the scenario, a name and a mode
The name is only for you ("Sales team, March cohort"). Choose Chat, Voice or Avatar. Each option shows what one conversation costs.
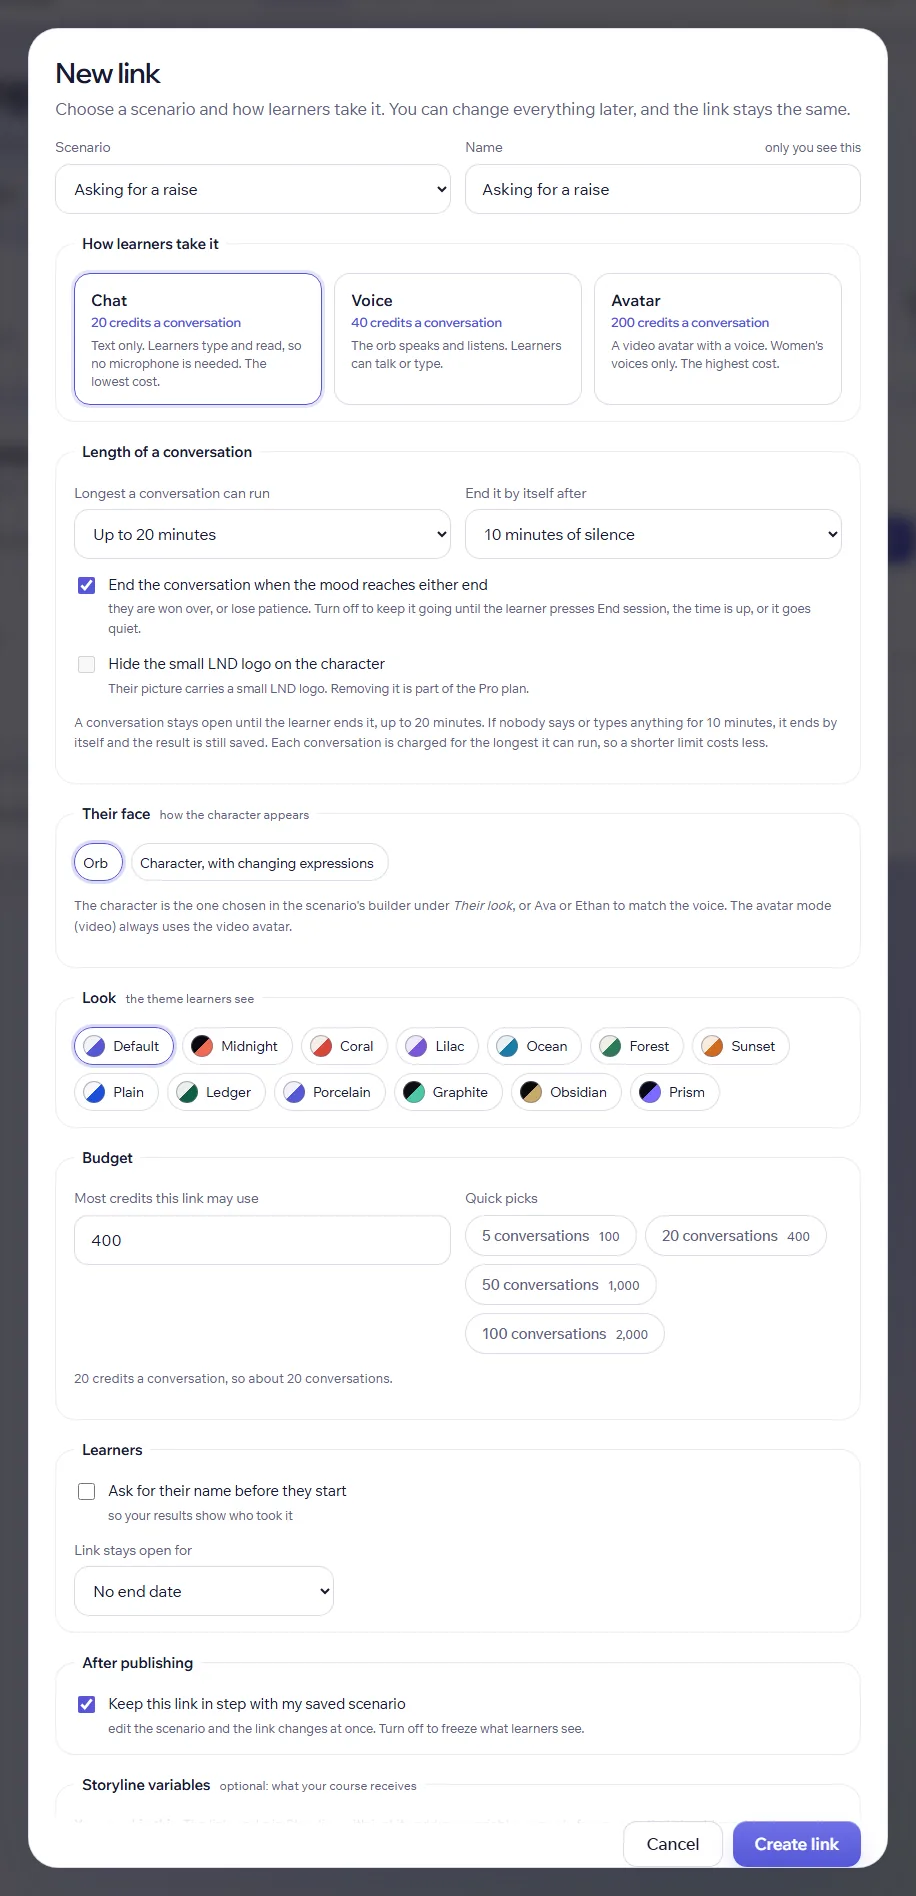
Choose the scenario, a name and how learners take it. Set how long a conversation can run
Longest a conversation can run is the limit for one learner (the default is 20 minutes). A conversation stays open until the learner presses End session, so they can take as long as they need up to that limit. End it by itself after closes a conversation that nobody has spoken or typed in for that long (the default is 10 minutes), so a forgotten tab does not keep running. In both cases, and when the learner ends it, the result is still scored and saved. End the conversation when the mood reaches either end is on by default: the character says goodbye and the result appears when they are won over, or when they lose patience (or after 12 replies). Turn it off for a longer, open conversation that only the learner, the time limit or silence ends. A conversation that ends that way is scored on what was said, and counts as passed with at least 70% of your criteria met. Each conversation is charged for the longest it can run, so a shorter limit costs less.
Set a budget
The budget is the most tokens this link may use. Use a quick pick (for example 50 conversations) or type your own. When it is used up, the link tells learners it is not available, and nothing else is charged. You can add budget at any time.
Decide who can take it
Tick Ask for their name if you want your results to show who took it. Choose how long the link stays open, or leave it open for ever.
Choose what your course receives (optional)
You can skip this step: the link works with just its address. The defaults send the mood, the score, pass or fail, the feedback, "finished" and "result ready". Change the Storyline variable names to match yours, or untick any you do not need. You can also add your own variables: give each a name, a type and a plain sentence about when it should change, for example "Agreed to date, True/False, when they say yes to a date". The character decides each one from the whole conversation when it ends.
Create the link
The next screen gives you the address, the Storyline code and the embed code, ready to copy. Everything can be reopened from the link's Storyline and embed button.
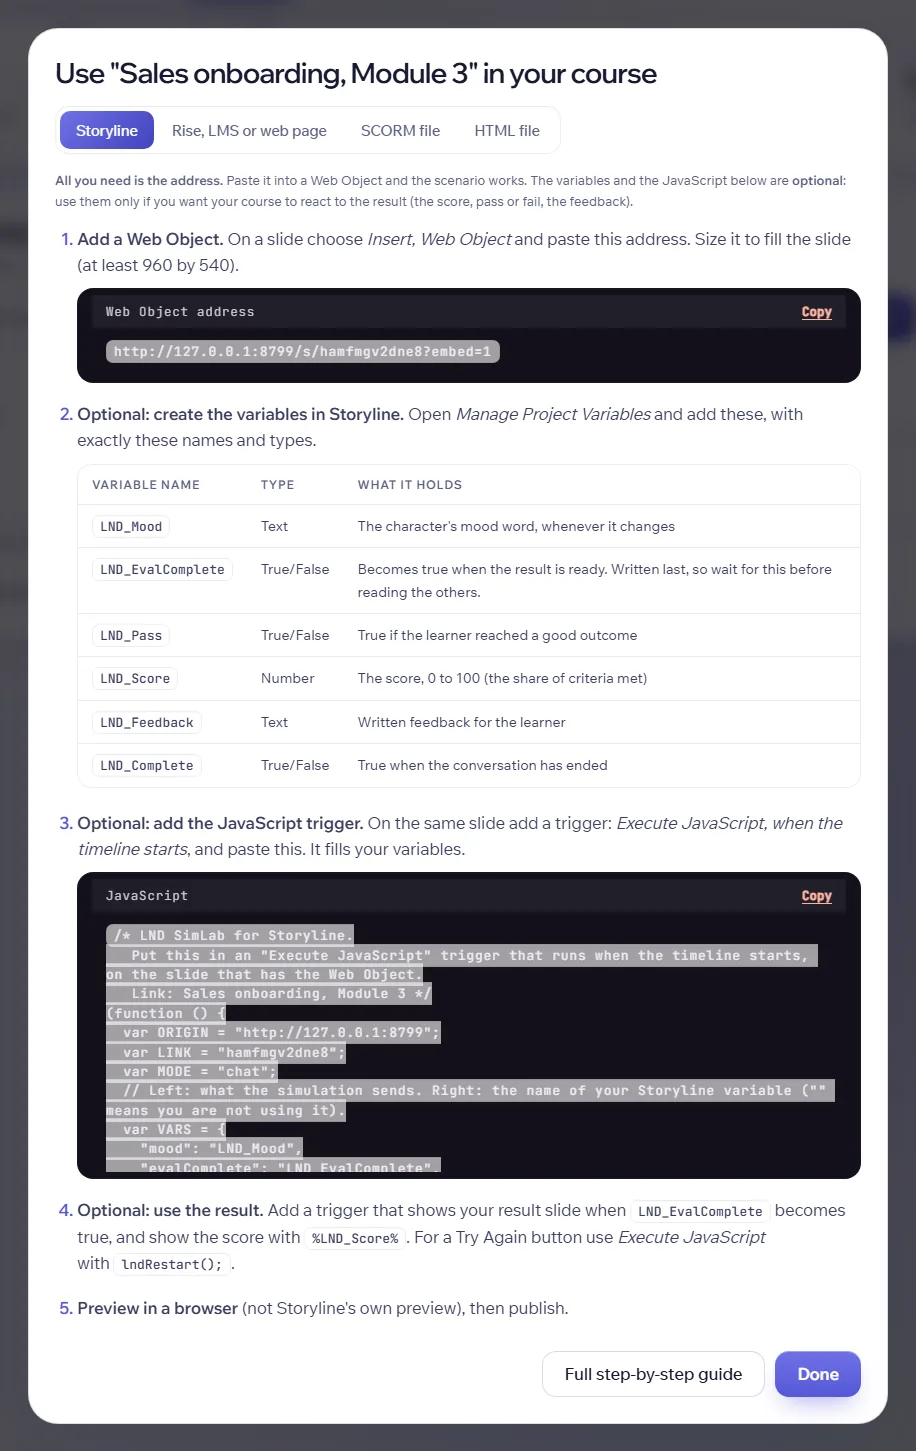
The Storyline window lists the variables to create and the address and code to paste.
Changing a link after you publish it
The link never changes, so nothing has to be pasted again. Press Edit on its card to change:
- the name, the mode, the longest a conversation can run, how long silence is allowed, the budget (to add more, or lower it, though never below what is spent), the end date, and whether it asks for a name;
- the look: choose Light or Dark under Look, to match your course. Learners see that mode and cannot change it. Leave it on Learner's own to let each learner keep their own;
- the variables your course receives, and the names you gave them;
- whether it follows your scenario. With Keep this link in step with my saved scenario on (the default), anything you change in the scenario goes live at once. Turn it off to freeze what learners see, and use Copy my latest scenario into this link now when you are ready to update.
Use Turn off to pause a link (learners see a short "not available" message) and Turn on to resume it with the same address. Delete removes it for good, along with its results.
Seeing who used it
Each link card shows conversations, learners, the average score, the share who passed, the tokens used out of the budget, and a 14-day chart. Results opens a table with each learner's name and email, when they started, whether they passed, how it ended (finished, ended by the learner, or closed for no activity), their score, the time taken and the tokens used, with a score chart above it. Under the table, Download as CSV, Word or PDF saves it for your own reports. All results at the top of the page puts every link into one table (with a Link column) that you can download the same way. The top of the page adds everything up across your links, and shows your token balance with an Add tokens button.
2. In Articulate Storyline 360
All you need is the address. Paste it into a Web Object on the slide where the conversation should appear, and the scenario works. That takes about two minutes. The variables and the JavaScript trigger (steps 2 to 4) are optional: add them only if you want your course to react to the result, for example to show a score or branch on pass or fail.
Insert a Web Object
Choose Insert, Web Object, paste the address from the dialog (it ends in
?embed=1), and size it to fill the slide (a width of 960 by a height of 540 pixels or more works well). The conversation adapts to the size you give it, and long results scroll inside it. Leave it loading on the slide, not in a new window.Optional: create the variables
In Storyline choose Manage Project Variables (the small x button in the Triggers panel) and add one for each value you chose to send. The name and the type must match exactly, including capital letters and spaces. The default set is:
Name Type Starting value LND_MoodText (empty) LND_CompleteTrue/False False LND_EvalCompleteTrue/False False LND_PassTrue/False False LND_ScoreNumber 0 LND_FeedbackText (empty) The link's Storyline and embed dialog lists exactly the variables your link sends, with their types.
Optional: add the JavaScript trigger
On the same slide add a trigger: Execute JavaScript, when the timeline starts. Paste the code from the dialog. It listens to the conversation and writes into your variables. For voice links the same trigger lets the frame use the microphone (the page reloads once).
Optional: react to the conversation
- Show the character's mood. Add a trigger per mood word: Change state of the character to "Angry" when
LND_Moodequals "Furious", and so on for the five words of your scenario. - Hold the learner until it is done. Set the Next button's state to Disabled and add a trigger: Change state to Normal when
LND_EvalCompletechanges to True. - Show the result. Put a text box on your result slide with
%LND_Score%,%LND_Feedback%and%LND_Pass%, or jump to different slides whenLND_Passis True or False. Always wait forLND_EvalCompletebefore reading the others, because it is written last.
- Show the character's mood. Add a trigger per mood word: Change state of the character to "Angry" when
Add Try Again (optional)
Add a button with the trigger Execute JavaScript:
lndRestart();. It starts a fresh attempt and clears the variables.Test in a browser, then publish
Storyline's own preview does not always show Web Objects. Use Preview in a browser, or publish to Review 360 or your LMS and open it there. Edits you make in SimLab reach the course straight away. You never republish the Storyline file for them.
LND_Score in your Storyline logic and set your own tracking.Variables your course can receive (optional)
You do not need any of this to use a scenario in Storyline. The address alone is enough. Read on only if you want your course to react to the result. The conversation sends its state to the page around it, in full, whenever something changes. You choose which values go to which Storyline variable.
| Value | Type | When it changes |
|---|---|---|
| Mood | Text | The character's mood word, whenever it changes. The words come from your scenario's own mood scale. |
| Result ready | True/False | Becomes true when the result is ready. Written last. |
| Passed | True/False | True if the learner reached a good outcome, or ended the conversation (or ran out of time) with a score of at least 70. |
| Score | Number | 0 to 100: the weighted share of your criteria the learner met (Essential criteria count more than Minor ones; all Normal means an equal share). |
| Feedback | Text | The written feedback, including notes on tone. |
| Finished | True/False | True when the conversation has ended. |
| Replies | Number | How many replies the learner has sent. |
| Seconds | Number | Time since it started. |
| Your own | True/False, Number or Text | Decided from the whole conversation when it ends, following the sentence you wrote. |
Good custom variables are things your course can branch on: "Agreed to a follow-up, True/False, when they accept a follow-up meeting", "Warmth, Number, how warm they became from 0 to 10".
Rise 360, other authoring tools and web pages
Anything that takes an iframe works. In Rise 360 add an Embed block and paste the embed code from the link's Storyline and embed dialog, Rise, LMS or web page tab:
<iframe src="https://…/s/YOUR-LINK?embed=1" allow="microphone; autoplay"
  style="width:100%;height:760px;border:0"></iframe>
Or just share the link: it opens the conversation full page. To pass a learner's name along, add it to the address, for example ?learner=Maya%20Johnson.
SCORM and your LMS
The SCORM file is a SCORM 1.2 package that works in most LMSs (Moodle, TalentLMS, Cornerstone, Docebo and others). It holds only a small launcher, so the conversation runs live from our server and your edits reach learners without uploading a new file.
Download it
On the link's card press SCORM file.
Upload it to your LMS
Add a SCORM activity or course and upload the zip. Choose SCORM 1.2 if asked. Do not unzip it.
Learners open it from the LMS
The LMS gives the learner's name to SimLab, so your results show who took it.
The LMS receives the score (0 to 100), passed or failed and the time spent. A pass is never replaced by a later fail in the same launch. Learners need an internet connection, and the link must stay turned on and have budget.
Characters and expressions
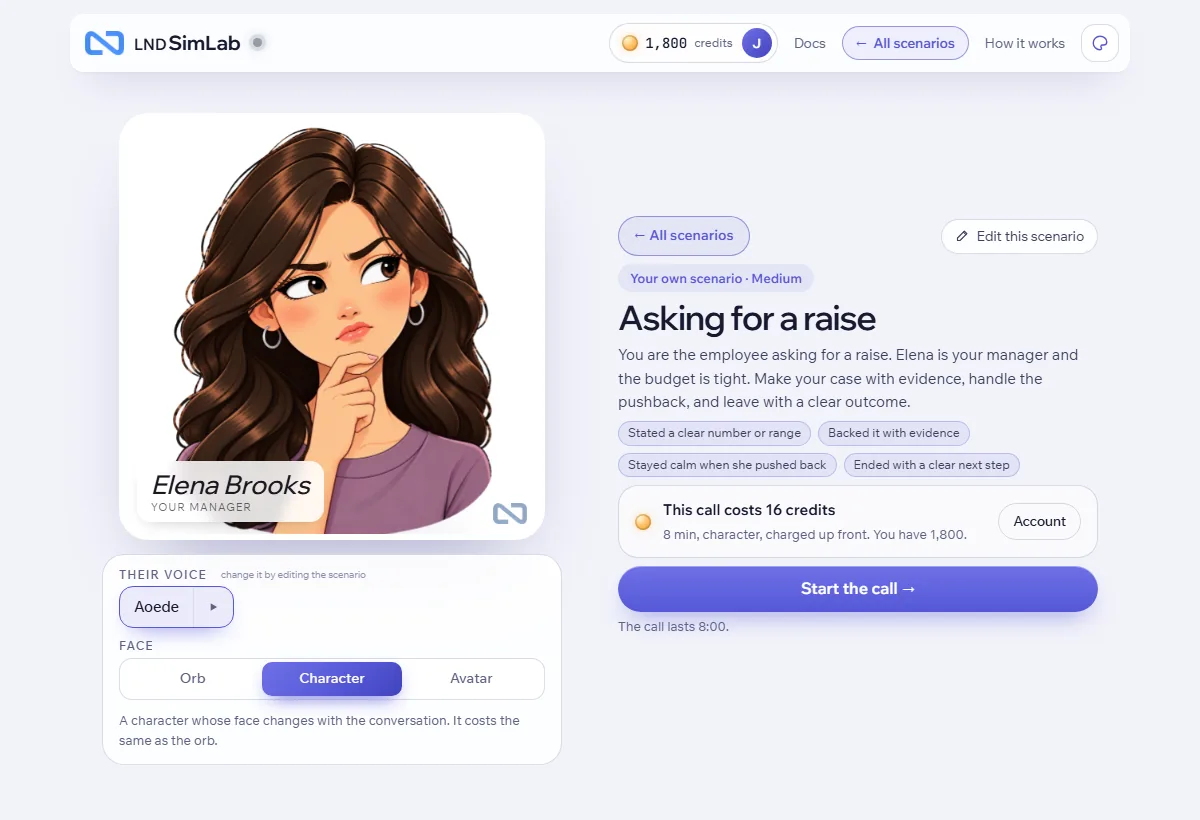
Besides the orb and the video avatar, the other person can appear as a character: a picture of a person whose face changes with the conversation. It runs in the learner's browser, so it costs the same as the orb (voice or chat) and works in Storyline and in every share file.
- Choosing one: in the scenario builder, section Their look, pick Ava or Ethan (the voice changes to match). On a scenario's start screen, the Face buttons offer Orb, Character and Avatar. On a link, Their face in Edit chooses Orb or Character.
- Expressions: the character shows neutral, calm, happy, laughing, surprised, nervous, sad, crying, sceptical, annoyed, angry, furious, thinking or smug. The model chooses one with every reply, and it always fits the mood bar: it never smiles when they are furious or scowls when they are won over.
- How it starts: How they look when it starts sets the first expression, so a nervous employee or an angry customer looks that way from the first words. Left on its default, it follows the difficulty. The AI draft also suggests one.
- At the end the face shows how it went: pleased when they are won over, fed up when the conversation breaks down.
- There is no lip-sync. The picture moves a little with the voice instead.
Your own characters
The Characters page (in the side menu, under Practise) shows the built-in characters (click one to see all 14 expressions) and the characters you have made. Add a custom character opens an editor:
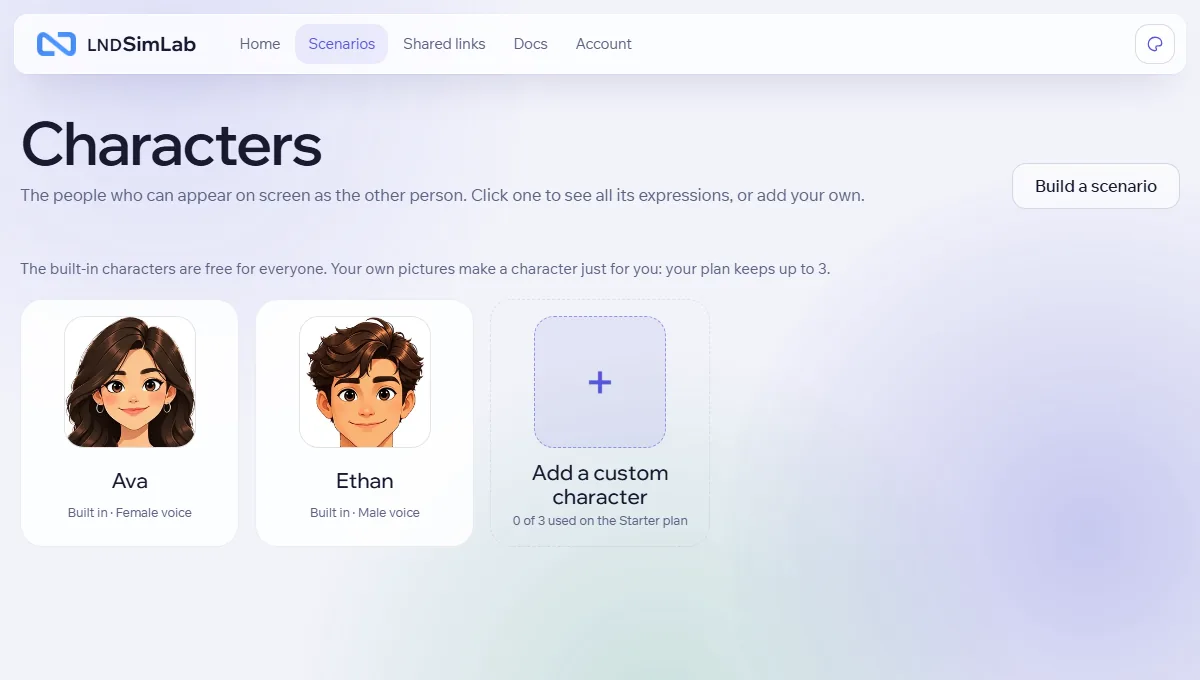
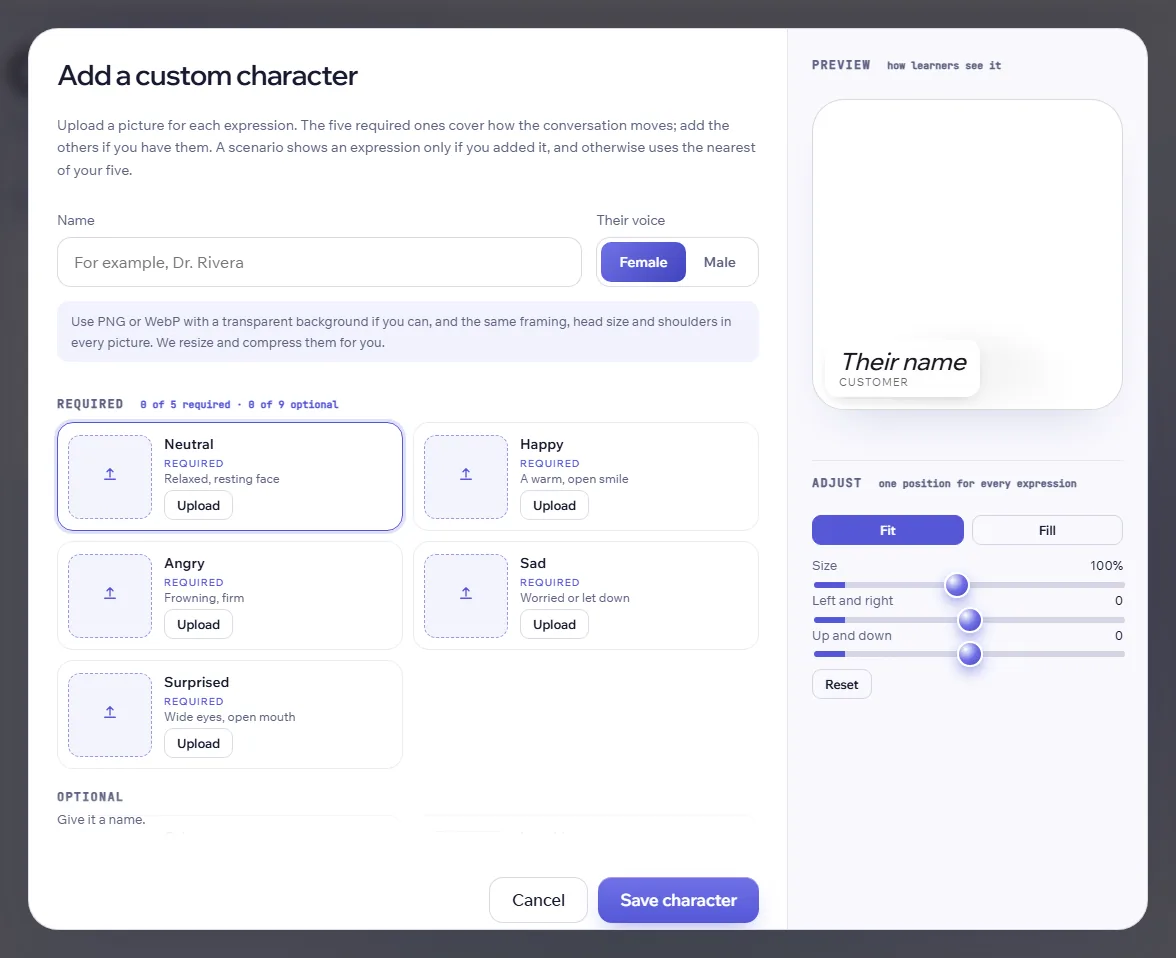
- Name and voice: the voice (female or male) goes with the character wherever you use it.
- Pictures: five are required (neutral, happy, angry, sad, surprised). The other nine (calm, laughing, nervous, crying, sceptical, annoyed, furious, thinking, smug) are optional. When a scenario needs an expression you did not add, it shows the nearest one you did: for example furious uses angry, and crying uses sad.
- Good pictures: PNG or WebP with a transparent background, the same framing, head size and shoulders in every picture. We resize them to fit and compress them, so there is no need to prepare them.
- Adjust: the preview shows the same white frame learners see. The character is centred in the frame. Fit shows the whole picture; Fill makes it cover the frame (the edges may be cropped). The sliders then set the size and position for every expression at once.
- Using it: once it is saved it appears in the scenario builder under Their look, marked as yours. Learners on your shared links see it too.
- How many: the free trial keeps 1 custom character, Pro and Lifetime 10. Deleting one frees a place.
- No LND branding on shared links: a shared link shows no LND logo, name or watermark, whatever your plan.
- Hints: a learner gets 4 hints in each conversation. A hint says what to do and how, with a sentence to start from, and never repeats something already done.
- Changing a scenario: edits are kept only when you press Save or Apply. If you go back with changes, you are asked whether to apply or discard them.
- Only upload pictures you have the right to use. Your pictures are yours and are only used where you choose to use the character.
Using your own AI key
On the Account page, under Settings, Your own AI key, you can save a key from Google Gemini, OpenAI or Anthropic and choose which one to use. It then runs the character's replies and the scoring, both in your own practice and in every link you share.
- What it covers: the conversation model only. Voice and speech stay on our service, so tokens are charged exactly as before.
- Your key is checked with the provider when you save it. It is kept encrypted, is never shown again (only its last four characters), and is only handed to the conversation engine for a conversation that needs it.
- Who pays the provider: you, directly, for every conversation that uses your key, including those of learners on your links.
- If the key stops working (removed, out of quota or switched off at the provider), the conversation carries on with our own model without interrupting the learner.
- Choose Our own model at any time to stop using it, or remove the key.
Tokens and budgets
- Whose tokens? Yours. Learners never see tokens or need an account.
- When is it charged? When a conversation starts, for the longest it can run (the limit you set on the link), from your balance and from the link's budget. A conversation that cannot start is given back automatically.
- What happens at the limit? When the budget is used up, or your own balance is too low, learners see "This simulation isn't available". Nothing more is charged. Add budget or tokens and it works again.
- Staying in control. Turn a link off at any time, set an end date, or keep the budget small to start. The page shows how many tokens each link has used.
- How many people at once? Chat has no limit. Voice calls (the orb) allow three at the same time, and the video avatar one at a time. A learner who arrives when the seats are taken is asked to try again in a minute.
- How many links? The free trial keeps 1, Pro and Lifetime 100.
Troubleshooting
My Storyline variables do not change
Check that the names match exactly (capital letters and spaces count), that each type is right, that the JavaScript trigger is on the same slide as the Web Object and runs when the timeline starts, and that you are testing in a browser, not in Storyline's own preview. The link's dialog shows the exact names to use.
The microphone is blocked in my course
Some course players do not pass the microphone to embedded pages. Use Chat mode, which needs no microphone. For voice, the page offers Open in a new window, where the browser asks for permission normally.
Learners see "This simulation isn't available"
The link is turned off, past its end date, out of budget, or your tokens are too low. Open the scenario's Share tab: the link's card says which one.
I changed my scenario but the link did not change
Open Edit and check that Keep this link in step with my saved scenario is on, or use Copy my latest scenario into this link now. The scenario must still be complete.
The results do not show names
Tick Ask for their name on the link, or pass ?learner=Name in the address. In an LMS the name comes from the LMS.
The conversation ended suddenly with "The conversation broke down"
By default the conversation ends when the character's mood reaches the end of its scale: fully won over, or out of patience. The bar under the picture (Where you stand) shows how close it is. If you want longer conversations, open Edit on the link and turn off End the conversation when the mood reaches either end, or soften the character's behaviour in the scenario.
The text looks cramped or cut off in Storyline
Make the Web Object bigger: at least 960 by 540 pixels, ideally the whole slide. The page fits the space it is given, and long results scroll inside it.
How does a learner finish early?
They press End session under the conversation. The conversation is scored from what was said, the result appears as normal, and your variables are set. Ending before saying anything scores 0. A conversation that is left alone for the idle time you set is closed the same way.
A result is missing
Results are saved when a conversation reaches its end (a good outcome, a breakdown, the time limit, the learner pressing End session, or the idle time). A learner who closes the page early shows as "Not finished".
SCORM shows no score in my LMS
The score is sent when the result is ready, a few seconds after the end. Make sure the activity is set to track the score or completion, and that the learner stays on the page until the result shows.
For developers
The page posts its state to the parent window (window.parent) and to the window that opened it. Messages are plain objects:
{
  source: "lnd-simlab", type: "state", link: "<link id>",
  mood: "Curious", turn: 3, timer: 142,
  started: true, complete: false, evalComplete: false,
  pass: false, score: 0, feedback: "",
  vars: { "Agreed to date": false }      // your own variables, when it ends
}
Check event.origin against the SimLab address before trusting a message. A { source: "lnd-simlab", type: "ready", mode } message is sent once the page has loaded. To start a new attempt after a result, post { source: "lnd-host", type: "restart" } to the frame.
Questions
Do learners need an account?
No. They open the link. If you ticked "Ask for their name" they type it first.
Can I use it in tools other than Storyline?
Yes: Rise 360, any LMS that accepts SCORM 1.2, and any web page that can embed an iframe.
Is the learners' conversation stored?
Your results keep each learner's name (if given), the date, the score and the tokens used. The text of the conversation is not kept.
Can two people use one link at the same time?
Chat conversations run at the same time. Voice and avatar conversations are limited to one at a time for now, so a second learner may be asked to try again in a minute.
Missing something? Tell us what you are trying to do in your course and we will add it to this guide.